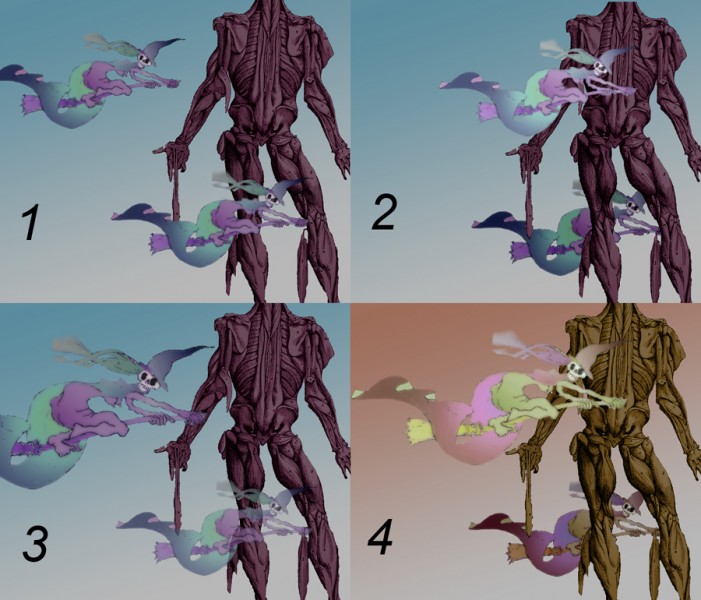
If you’ve just used Photoshop to adjust photos a bit, you may not have needed to use layers. For any more ambitious stuff, they’re essential, and at the heart of what makes it such a powerful package. As a demo I’ll use elements from my Halloween image – not maybe my finest hour, but useful for showing layers. This montage shows the basics of what you can do with them. (According to me! I’m not a real Photoshop wizard, and your comments and corrections would be very welcome).
Think of the montage as four separate images. Within each of the four images, there are five layers, one for each witch, one for the muscleman, one for the sky background, and one blank, truly background layer. You select the layer you want to work in, and changes you make in one layer don’t affect the others.
By working in one layer at a time, you can for example move elements of your picture round the screen (compare the top witch in 1 & 2); change which elements are in front of which (compare the lower witch in relation to the muscleman in 1 & 2); change the size of an element (compare the upper witch in 1 and 3); darken or lighten an element (compare the top witch in 1 and 2 again); make en element more or less transparent (note the lower witch in 3); or play with the overall colour and tonal scheme (I’ve changed all the layers that way in 4).


