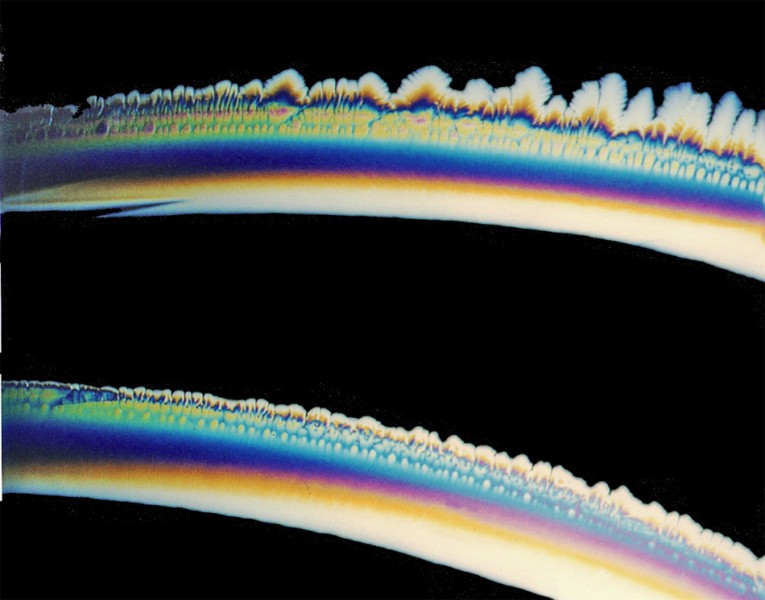
Like our bubble pictures this is not really an illusion, but I am fascinated by natural shapes. It’s a picture of blades of ice, and what you see here is about three inches across. The colours come from taking the picture in polarised light, as the crystal blades were forming in a shallow dish of water in a freezer.
Want to try your own pictures? The preparations are not trivial, but there’s nothing a school science section couldn’t handle.
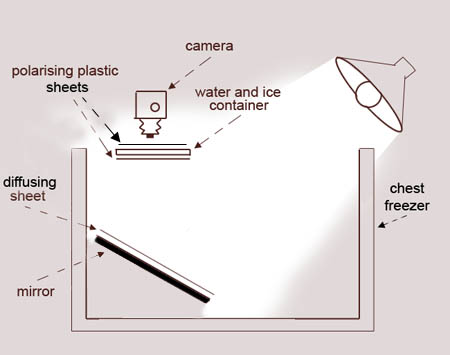
I took the picture a long while back. I got hold of a clapped out old chest freezer, top opening, about four feet long, two feet wide and thirty inches deep, and took off the lid. I made a little transparent tray an inch deep and about a foot square, out of rigid clear plastic sheet. I made a support to hold it by the edges, just a bit below the level of the top of the freezer. Then I shone a lamp via a mirror at the bottom of the freezer, so that it illuminated the transparent tray from underneath. I set up my camera looking down on the tray from above. There was a filter of flexible polarising plastic sheet immediately under the tray, and another above it, between it and the camera. (I got those filter sheets from a school science supplier). By rotating the upper filter, I was able to tune the light and colour effects. Somewhere I had a sheet of diffusing translucent paper. I’ve forgotten whether that went immediately under the lower polarising filter, or on the surface of the mirror, but trial and error would sort that out. So here’s a diagram of the set-up.
Then I filled the little transparent tray with water three quarters of an inch deep, switched on the freezer, waited for the ice crystals to begin to form, and snapped away. Er, that’s not a very green thing to do, to cool down an open, empty chest freezer. This was really a long time ago. But the pictures are so striking, I reckon maybe it’s still forgivable, if you don’t make a habit of it. I seem to remember it didn’t take all that long for the ice to begin to form – an hour or so. Then you have to act fast, because the really delicate effects don’t last long, then the blades thicken up. The whole thing freezes solid fairly quickly.
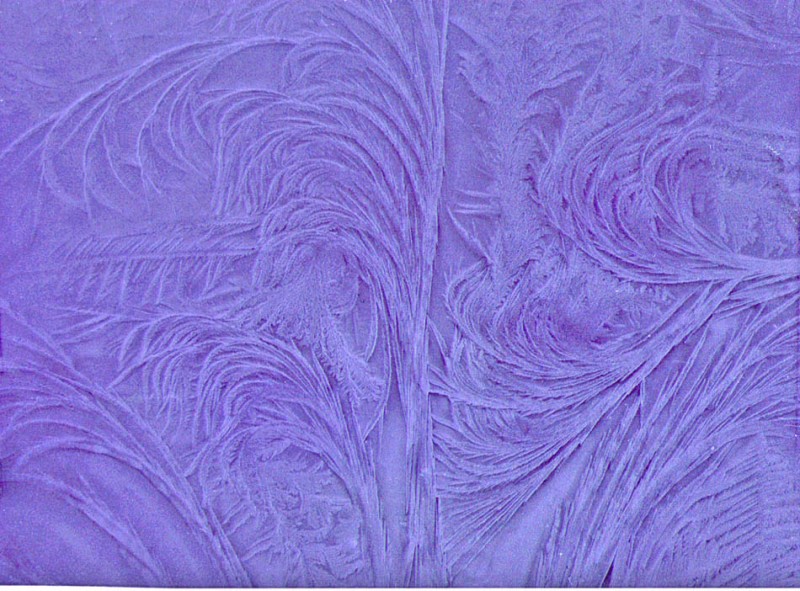
Later I tried again, because what I really wanted was to produce the kind of ice patterns called ice flowers, which you get when the condensation on the inside of windows freezes, in houses without heating. I never did crack getting those to form artificially, and I wasn’t the only person in the house, so I couldn’t really just turn off the heating when it froze. But one thing I tried did produce some nice images. I used the same set-up, but thickened the water a bit with cooking gelatine, and the layer of liquid was very thin, only a millimetre or two. Here’s one of the patterns I got.
That’s a false colour image, and I don’t think I used the polarisers for the gelatine pictures – or rather, think I tried them, but didn’t get a good result. I think I had to tint the water with water colour paint instead. (This colouring is courtesy Photoshop)
If like me you’re fascinated by pattern in natural shapes, easily the best book on the subject is one now out of print, The Self Made Tapestry by Philip Ball. It’s college level stuff, but it’s so good it costs a lot even second hand. However, don’t despair because he’s just published the first volume of a three volume second go at the subject.


