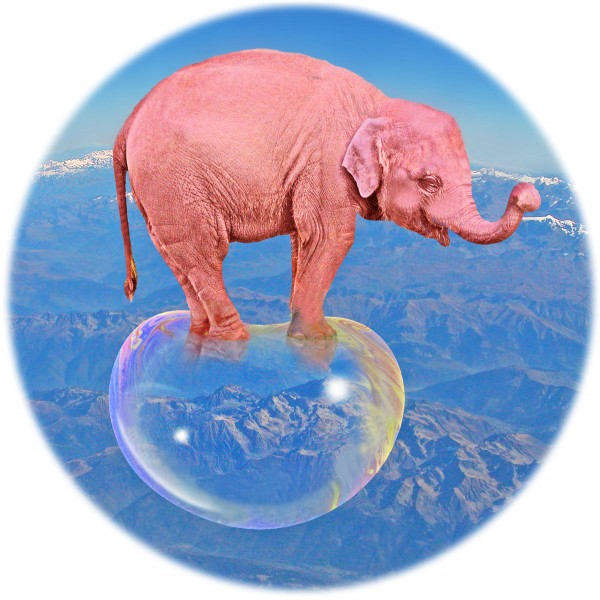
Here’s a picture to introduce a post about how I take photos of soap bubbles. OK, I admit I didn’t snap this one out of an aeroplane window. I also admit that Photoshop had something to do with it, and I’ll get to that in later Photoshop posts. But the bubbles start out as real bubble photos, and if you wonder how, read on below. (If you’d just like some bubble pictures for your own site, there are two you can link to on our page of link thumbnails, and I’ll be adding many more later. There’s an earlier post too, with another bubble picture. Or if you need easy presents for someone, why not browse some fun bubble image and illusion stuff to buy.)
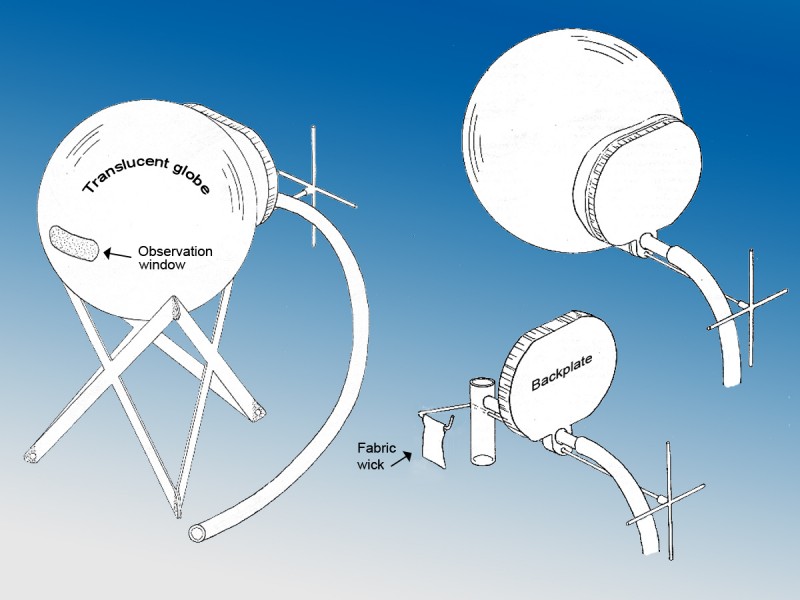
I and colleagues devised a contraption for looking at soap bubbles decades ago, as a hands-on museum exhibit. Here’s a diagram:
Here’s how it works. The bubble chamber is a translucent globe, about 24cm across. In brief, an air tube leads into the chamber from the back, ending in a little vertical pipe. The bottom of the chamber is filled with soapy water, and the bottom of the vertical pipe comes to just below the surface of the liquid. And here’s the fiendishly clever bit! There’s a little fabric cloth, (the wick), which can be rotated from outside the chamber by an armature, first under the liquid surface to pick up soapy water, and then over the top of the little vertical pipe, to leave a film of soap, so that you can easily keep priming the device for new bubbles. Whenever there’s a film of soap over the top of the pipe, you just blow down the air tune, and there’s your bubble.
In more detail, the chamber has a little aperture at the front, for observation or photography, and a big aperture at the back. Into that back aperture I plug a rigid back-plate, which does two jobs. First it acts as a background for the bubbles, so the side facing into the chamber is black. Second, it supports both the air pipe and the wire armature that holds the wick.
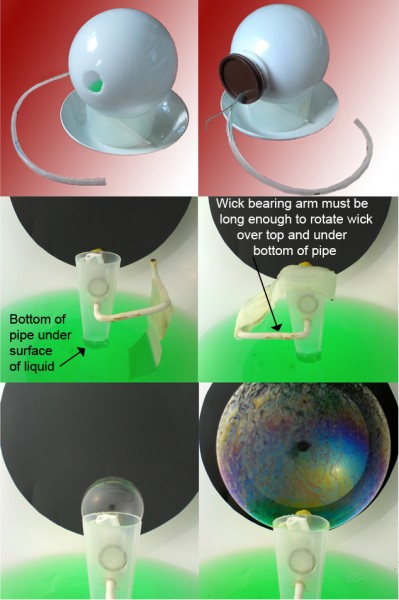
The real devices have not been as elegant (?) as the one in the diagram. Here’s a photo of one, and then from the front pictures of the wick gathering liquid, the wick being drawn over the top of the pipe, a bubble beginning to appear, and a large bubble.
These pictures of course were not lit and angled so as to show off the bubble to best advantage, but to try to show how the armature works. Note that you can just see, through the plastic pipe, just above where the wire wick armature passes through it, the inlet for the air tube. The whole contraption is cobbled together from bits and pieces. The chamber is a plastic garden lighting globe, with by chance a hole just the right size to take a grocery pot as a rigid back-plate, and a small observation hole cut out of the front. The tubes are from home brewing and aquarium supplies and the wire was a straightened coat hanger. And just to make assembly a nightmare, the background is a floppy black plastic disk (cut from cheap school type folder cover), which had to be fed into the chamber fixed to the backplate and then unfolded, because I wanted a background bigger than the area of the backplate.
The disadvantages of the device are that there’s always a reflection of the observation slot right bang in the middle of the bubble, and the top of the pipe intruding at the base of the bubble, but those are quite easily airbrushed out. A bigger problem is that because the light is fairly defuse, transmitted through the plastic globe, the bubbles never have quite the intensity of colour of soap films seen in less distributed light sources. But the great beauty of the device is that you do get turbulence patterns a bit like the ones in Earth’s atmosphere, or round Jupiter, all round the bubble. And wonderful effects come and go, which vary with different soap solutions, as gravity begins to concentrate the soap towards the bottom of the bubbles. I usually use flash to take the pictures, but you need more than one light source, syncronised, to get all round illumination. But I’ve got great results sometimes with a bit of artistic movement blur, when just lighting the globe with table lamps.
Getting the soapy liquid right is a black art, the control of the bubbles isn’t easy, focus is really tricky, so is the lighting, etc, etc. But you’ll crack it!
For details of the techniques of two other bubble photographers, check out Karl Deckart’s site, and Jason Tozer’s pictures of bubble planets.


